2019. 5. 29. 15:05ㆍNode.js
오늘은 mongoose와 node.js를 연동해보고자 합니다 . ( 현재 mongodb는 local에 설치되었다는 가정하에 진행됩니다 . )
일단 node-mongo라는 이름의 프로젝트를 생성해 보도록 하겠습니다 .
express --view=pug node-mongo
cd node-mongo
npm install
그다음 mongodb와 연동하기 위한 mongoose를 설치해줍니다 . ( MySQL의 시퀄라이즈와 비슷함. 시퀄라이즈는 ORM(Relational) , mongoose는 ODB(Document))
npm install mongoose
위의 내용대로 설치가 끝나셨다면 이제 한번 연동해보도록 하겠습니다 .
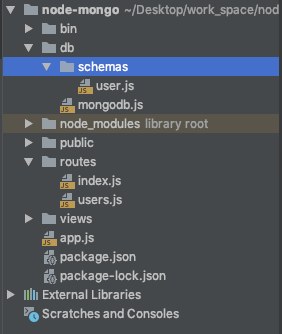
저는 좌측 이미지와 같이 폴더구조를 생성하였습니다 .( 폴더구조는 사람마다 다릅니다. )
node-mongo project 폴더 안에 db 폴더가 있고 그안에 schemas 폴더가 있습니다 .
db/mongodb.js에는 실질적으로 MongoDB와 연동하는 로직이 들어있습니다 .
schemas 폴더 안에는 MongoDB Document를 만드는것처럼 mongoose schema로 작성된 user.js 파일이 있습니다 .
※ 다 작성한뒤 node server을 재시작 해줘야합니다 . 저는 nodemon이라는 package를 사용하고 있기때문에 변경사항이 생기면 자동 반영됩니다 .
db/mongodb.js
const mongoose = require('mongoose');
mongoose.Promise = global.Promise;

module.exports = () => {
    const connect = () => {
        mongoose.connect('mongodb://127.0.0.1:27017/nodejs')
            .then( () => {console.log("몽고 디비 연결 성공") })
            .catch( (err) =>  {console.log(`몽고디비 연결 실패 : ${err}`)});
    };

    connect();

    mongoose.connection.on('error' , (error) => {
        console.log(`몽고 디비 연결 실패 : ${error}`)
    });

    mongoose.connection.on('disconnected' , () => {
        console.log(`몽고 디비 연결이 끊어졌습니다 . `);
        connect();
    });

    require('./schemas/user');
};
mongodb 연결에 대해 환경설정을 하는 부분입니다 .
mongoose는 프로미스를 지원하지만 mongoose가 자체적으로 지원하는 mPromise는 deprecatied되었으므로 NodeJS가 지원하는 ES6의 Promise를 넣어준다 .
참고 https://poiemaweb.com/mongoose
mongoose에 연결에 대한 이벤트 리스너를 달아주었고 (error , disconnected) 에러가 났을경우 에러 출력 연결이 끊어졌을시 다시 Connection을 할수있도록 해놓았습니다 .
참고 https://www.zerocho.com/category/NodeJS/post/57924d1e8241b6f43951af1a
그다음 사용할 스키마들을 require해줍니다 . 저 같은 경우는 db안에 schemas 폴더가 있기 때문에 './schemas/user'로 입력해줍니다 . 확장자 명 제외 .
그다음 app.js 파일로 이동하여 설정을 추가해줍니다 .
const mongodb = require('./db/mongodb');

mongodb();
아직 바로 시작하지 말고 Schema 설정을 해줘야합니다 .
db/schema/user.js
const mongoose = require("mongoose");

const {Schema} = mongoose;

const userSchema = new Schema({
    name : {
        type: String,
        required : true,
        unique : true,
    } ,

    password : {
        type:String ,
        required : true,
    },

    age : {
        type: Number,
        required: true,
    },

    createAt : {
        type : Date ,
        default : Date.now,
    },

    updateAt : {
        type : Date ,
        default : Date.now,
    }
});

/**
 * model의 첫번째 매개변수에 collection이름을 넣어준다 , 첫글짜를 소문자로 바꾼뒤 복수형으로 바꿔서 컬렉션을 생성해준다.
 * 직접 이름을 지정해주고싶다면 3번째 매개변수에 collection의 이름을 넣어주면 된다 .
 * */
module.exports = mongoose.model("User" , userSchema);
user.js의 소스는 다음과 같습니다 . name , password , age , createAt , updateAt 컬럼 5개가 존재합니다 .
name : Data Type은 String 이고 , 필수 값이며 고유한 값이어야 한다.
password : Data Type은 String이고 필수 값이어야 한다 .
age : Data Type은 Number이며 필수 값이어야 한다 .
createAt , updateAt : Data type은 Date이며 기본값은 데이터 생성 당시의 시간이다 .
그다음 module.exports를 통해 연결해주는데 mongoose.model의 첫 번째 배개변수에는 collection이름을 넣어준다 User라고 넣어준다면 첫 글자를 소문자로 바꾼뒤 복수형으로 바꿔서 컬렉션을 생성해준다 , 하지만 이러한 강제 collection 이름이 맘에 들지 않는다면 3번째 매개변수에 원하는 collection 명을 적어주면 됩니다 .
여기까지 설정이 다 되셨다면 npm start를 통해 서버를 시작해보겠습니다 .
기존에 컬렉션이 있다면 생성하지 않고 컬렉션이 존재 하지 않는다면 model에 설정된 데로 mongodb에 collection을 만들게 됩니다 .
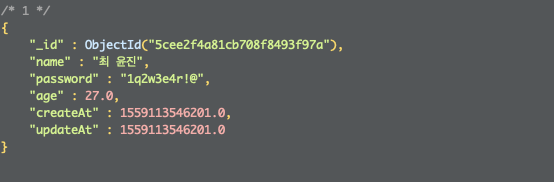
db.users.save(
{"name" : "최 윤진",
    "password" : "1q2w3e4r!@",
    "age" : 27,
    "createAt" : Date.now(),
    "updateAt" : Date.now()
})
위의 데이터를 복사한다음 mongodb에 추가한후 db.users.find({})를 통해 users collection을 조회하면 다음과 같은 화면이 나오는것을 확인 할 수 있습니다 .
자 그럼 npm start시 해당 mongodb에 collection이 생성된다는것은 확인하였습니다 .
그러면 이제 이 값을 어떻게 가져다 써야할까요??
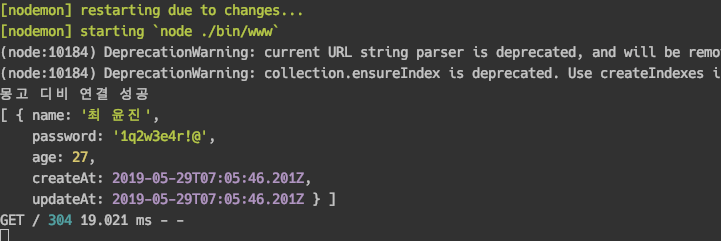
저는 localhost:3000/ 으로 접근시 현재 users collection에 들어있는 row 데이터들을 불러와 json 으로 return 시켜주는
로직을 구현해보도록 하겠습니다 . 생각보다 어렵지 않게 테스트 할 수 있습니다 .
routes/index.js
const express = require('express');
const router = express.Router();
const User = require('../db/schemas/user');

/* GET home page. */
router.get('/', function(req, res, next) {

    User.find({} , {"_id" : 0}).then( (users) => {
        console.log(users);
        res.json(users)
    }).catch( (err) => {
        console.log(err);
        next(err)
    });
});

module.exports = router;
사용하고자 하는 schemas/user를 불러와 User 변수에 담았습니다 .
그다음부터는 User를 통해 mongoDB에 있는 명령어를 똑같이 사용하여 값들을 꺼내올 수 있습니다 .
출력결과
'Node.js' 카테고리의 다른 글
| [Node.js] Node + Redis 연동 후 테스트 (0) | 2019.05.28 |
|---|---|
| [Node] dotenv 설치 및 사용 (0) | 2019.05.24 |
| [Node] Express 설치 및 프로젝트 생성 , 실행 (0) | 2019.05.24 |